Are you tired of dealing with a leaky bathtub faucet? Well, look no further! This practical guide from Paul’s Way Home Services is here to help you troubleshoot and repair that pesky leak.
You’ll learn how to identify the source of the leak, discover common causes, and gather the tools needed for the repair.
With step-by-step instructions and helpful maintenance tips, you can fix your leaky bathtub faucet and prevent future leaks.
Say goodbye to wasted water and hello to a fully functioning bathtub faucet!
Key Takeaways
- Identifying the source of the leak is the first step in the repair process.
- Common causes of bathtub faucet leaks include worn-out washers, loose connections, corroded valve seats, and faulty cartridges or O-rings.
- The tools and materials needed for repair include an adjustable wrench, screwdriver, plumber’s tape, and replacement parts.
- The step-by-step instructions for repairing a leaky bathtub faucet involve removing the handle, identifying the type of faucet valve, replacing the cartridge if necessary, reassembling the faucet, and testing for leaks.
Identifying the Source of the Leak
To identify the source of a bathtub faucet leak, you can start by inspecting the various components of the faucet. Diagnosing a bathtub leak can be simple if you know what signs to look for.
The first thing to check is the spout. If you notice water dripping from the spout even when the faucet is turned off, there’s a good chance that the spout is leaking.
Next, take a closer look at the handles. If you see water coming out from around the handles when you turn on the water, it may indicate a problem with the valve or the O-rings.
Another common sign of a bathtub faucet leak is water pooling around the base. This could mean that the seals around the base have worn out or the faucet isn’t properly sealed to the tub.
Additionally, if you hear a constant dripping noise coming from the faucet, it’s a clear indication that there’s a leak somewhere.
It’s important to remember that identifying the source of the leak is just the first step in the repair process. Once you have determined where the leak is coming from, you can proceed with the necessary repairs or call a professional plumber for assistance.
Common Causes of Bathtub Faucet Leaks
Now let’s explore the common causes of bathtub faucet leaks, so you can understand why these leaks occur and how to address them effectively. Here are four possible culprits behind your leaking bathtub faucet:
- Worn-out washers: Over time, the constant turning on and off of the faucet can cause the rubber washers to deteriorate. This can lead to leaks around the handle or spout. Replacing the worn-out washers is a simple and cost-effective repair option that can prevent potential water damage.
- Loose connections: If the connections between the faucet and the pipes underneath the bathtub become loose, water may seep through the gaps. Tightening the connections with a wrench can often solve this issue and prevent further leaks.
- Corroded valve seat: The valve seat connects the faucet to the spout, and can become corroded over time due to mineral deposits in the water. This corrosion can cause leaks around the spout. Cleaning or replacing the valve seat can resolve the issue and save you from potential water damage.
- Faulty cartridge or O-rings: In some cases, the cartridge or O-rings inside the faucet can wear out or get damaged, causing leaks. Replacing these components can often fix the problem and provide a cost-effective repair option.
By identifying the common causes of bathtub faucet leaks, you can take the necessary steps to address them effectively. Whether it’s replacing worn-out washers, tightening loose connections, cleaning or replacing the valve seat, or fixing faulty cartridges or O-rings, these cost-effective repair options can help you avoid potential water damage.
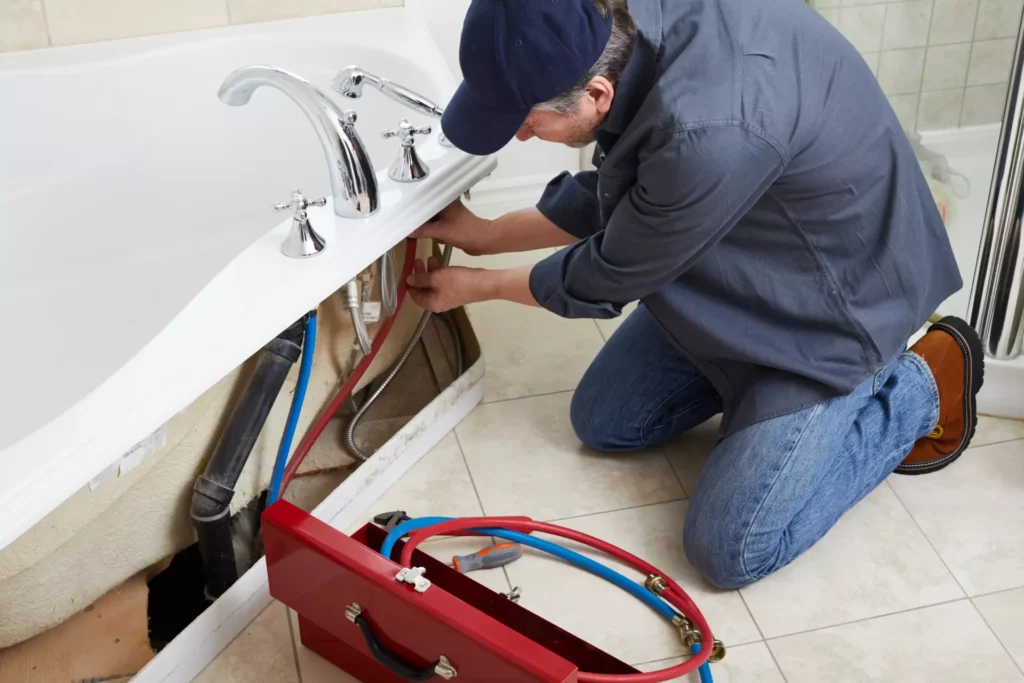
Tools and Materials Needed for Repair
You will need a few essential tools and materials to repair a bathtub faucet leak effectively. The right supplies will make the process easier and ensure a successful repair. Here are the tools and materials you’ll need:
- Adjustable wrench: This tool will help you loosen and tighten various fittings on the faucet.
- Screwdriver: A Phillips or flathead screwdriver will be necessary to remove any screws holding the faucet in place.
- Plumber’s tape: Also known as Teflon tape, plumber’s tape is used to create a watertight seal on threaded connections.
- Replacement parts: Depending on the specific issue with your bathtub faucet, you may need to replace certain parts, such as washers, O-rings, or cartridges. Having these on hand before starting the repair is a good idea.
- Plunger: In some cases, a clog may be causing the faucet to leak. Using a plunger can help dislodge any debris and restore proper water flow.
Regarding DIY techniques for bathtub faucet repair, following a step-by-step approach is important. Start by turning off the water supply to the faucet. Then, disassemble the faucet using the appropriate tools. Inspect each component for damage or wear and replace any faulty parts. Apply plumber’s tape to threaded connections to ensure a tight seal. Finally, reassemble the faucet and turn the water supply back on to test for leaks.
With the right tools, materials, and a little know-how, you can successfully repair a bathtub faucet leak and save yourself the hassle and expense of calling a plumber.
Step-By-Step Instructions for Repairing a Leaky Bathtub Faucet
To repair a leaky bathtub faucet effectively, begin by turning off the water supply and gathering the necessary tools and materials. Here are the step-by-step instructions to help you fix the problem and restore functionality to your bathtub faucet:
- Step 1: Remove the handle
- Use a screwdriver to remove the handle of the faucet. This will give you access to the bathtub faucet valve.
- Step 2: Identify the type of faucet valve
- Different types of faucet valves exist, such as compression, cartridge, ball, and ceramic disk. Identify which type your bathtub faucet has, as this will determine the next steps.
- Step 3: Replace the cartridge
- If your bathtub faucet has a cartridge valve, you’ll need to replace it. Remove the old cartridge by following the manufacturer’s instructions. Insert the new cartridge in its place, making sure it’s properly aligned.
- Step 4: Reassemble and test
- Put the handle back on and tighten the screw. Turn on the water supply and test the faucet to ensure the leak has been fixed. If the faucet still leaks, you may need to repeat the steps or seek professional help.
Remember, repairing a leaky bathtub faucet requires attention to detail and the right tools. By following these step-by-step instructions, you can save money and avoid the inconvenience of a leaking faucet.
Enjoy the satisfaction of fixing the problem and having a fully functional bathtub faucet again.
Preventing Future Bathtub Faucet Leaks: Maintenance and Tips
Regularly inspect and clean the components to prevent future leaks and maintain your bathtub faucet. By taking preventive measures and performing DIY maintenance, you can ensure your faucet remains in good working condition for years.
One important preventive measure is to check for any signs of leakage or dripping. Inspect the faucet regularly for any water droplets or moisture around the base, handles, or spout. If you notice any leaks, addressing them promptly is crucial to prevent further damage.
Another maintenance tip is to clean the faucet regularly to remove any built-up grime or mineral deposits. Use a mild cleaner or a mixture of vinegar and water to scrub the faucet and remove any dirt or debris gently. Avoid harsh chemicals or abrasive cleaners, as they can damage the faucet’s finish.
In addition to cleaning, it’s essential to lubricate the moving parts of the faucet to ensure smooth operation. Apply a small amount of silicone-based lubricant to the handle and other moving parts to prevent them from sticking or becoming difficult to turn.
Furthermore, it’s advisable to check the water pressure regularly. High water pressure can put strain on the faucet and cause leaks over time. If you notice unusually high water pressure, consider installing a pressure regulator to protect your faucet and other plumbing fixtures.
Summary
Troubleshooting and repairing a leaky bathtub faucet is a practical task that can be easily accomplished with the right tools and materials. By identifying the source of the leak and following step-by-step instructions, you can successfully fix the issue and prevent future leaks.
Regular maintenance and following helpful tips will also help ensure your bathtub faucet’s longevity.
With these simple steps from Paul’s Way Home Services, you can save money and avoid unnecessary water waste.